Wrapping text within another view in SwiftUI
When designing user interfaces in SwiftUI, we might encounter situations where we need to wrap text within another view, such as an image or a shape. This can be effectively achieved using the overlay() modifier. Let's explore this concept with an example and compare it with using a ZStack.
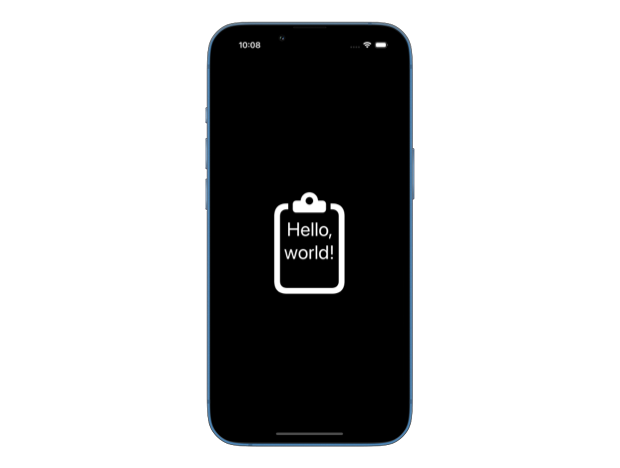
Consider the following code snippet where we use the overlay() modifier to wrap the text "Hello, world!" within a clipboard image:
struct ContentView: View {
    @ScaledMetric private var imageSize = 140
    @ScaledMetric private var fontSize = 40

    var body: some View {
        Image(systemName: "clipboard")
            .imageScale(.large)
            .font(.system(size: imageSize))
            .overlay {
                Text("Hello, world!")
                    .font(.system(size: fontSize))
                    .multilineTextAlignment(.center)
            }
    }
}
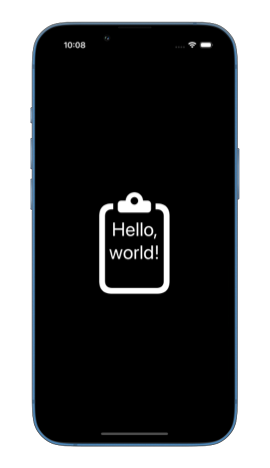
In this example, the overlay() modifier places the Text view directly over the Image view, allowing the text to wrap within the image's bounds. The multilineTextAlignment() modifier ensures that the text is centered within the overlay. We use @ScaledMetric for image and font sizes to scale the UI based on user's preferred accessibility size.
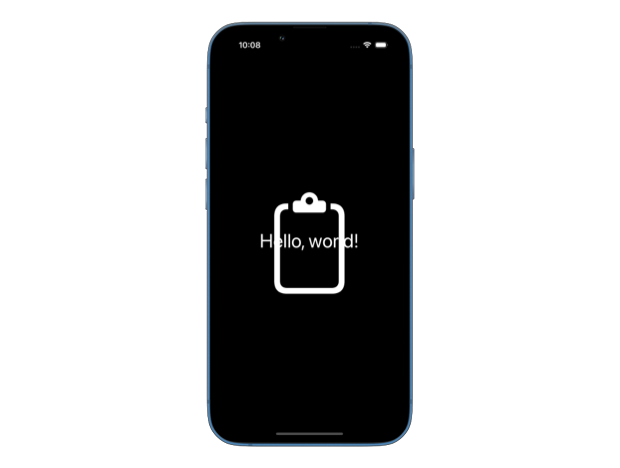
You might wonder why we don't use a ZStack for this purpose. Here's the same example using a ZStack:
struct ContentView: View {
    @ScaledMetric private var imageSize = 140
    @ScaledMetric private var fontSize = 40

    var body: some View {
        ZStack {
            Image(systemName: "clipboard")
                .imageScale(.large)
                .font(.system(size: imageSize))

            Text("Hello, world!")
                .font(.system(size: fontSize))
                .multilineTextAlignment(.center)
        }
    }
}
While the ZStack also places the text over the image, it positions the views independently based on the available space. This often leads to unwanted results, especially if the size of one view needs to depend on the size of another.
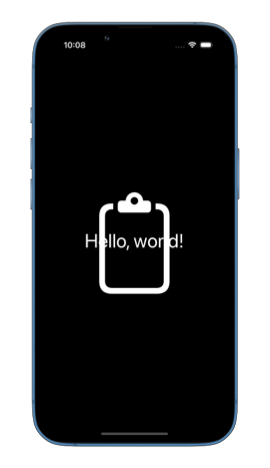
Using the overlay() modifier in SwiftUI allows us to create more cohesive and responsive designs where the size and position of one view can depend on another. This method is particularly useful when wrapping text within other views, ensuring that our layout behaves as expected.
If you want to build a strong foundation in SwiftUI, my new book SwiftUI Fundamentals takes a deep dive into the framework’s core principles and APIs to help you understand how it works under the hood and how to use it effectively in your projects.
For more resources on Swift and SwiftUI, check out my other books and book bundles.


