

Schedule a countdown timer with AlarmKit
At WWDC 2025 Apple introduced AlarmKit, a framework that lets us schedule one-time alarms, weekly repeating alarms, and countdown timers that start immediately. Unlike notifications we schedule with UserNotifications, which stay quiet in silent mode or during a Focus unless the app holds the rarely granted Critical Alerts entitlement, AlarmKit alerts cut through silent mode and focus with a permanent banner and sound. This makes AlarmKit the first widely available way to ensure that everyday timers and alarms always surface at the right moment.
I've been experimenting with integrating countdown timer scheduling with AlarmKit into one of my projects, and in this post I’ll share how it can be done.
# Check and request authorization
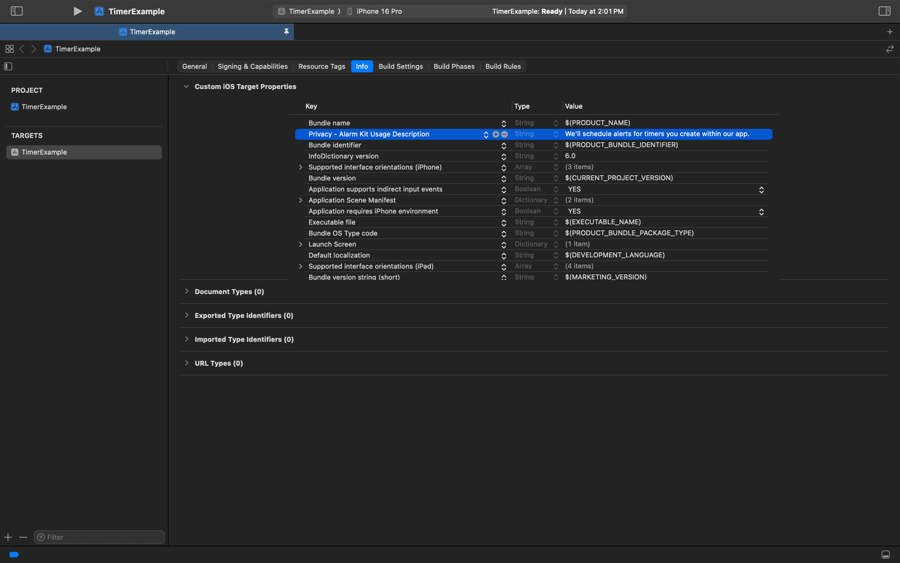
Because an AlarmKit timer ends with an alert that plays sound and appears even when a Focus is active, we must ask the user for explicit permission. The first step is to add the NSAlarmKitUsageDescription key to Info.plist and write a short explanation of why our app needs to schedule alarms or timers. This text will be shown in a system prompt that we'll trigger when the user schedules a timer in our app for the first time.
The next step is to check the current authorization status and, if it’s still undetermined, prompt the user. We can do that with the AlarmManager APIs. The shared AlarmManager instance exposes the authorizationState property for reading the status and the requestAuthorization() method for showing the system prompt.
import SwiftUI
import AlarmKit

struct TimerButton: View {
    private let manager = AlarmManager.shared

    var body: some View {
        Button("Start a timer", systemImage: "timer") {
            Task {
                if await checkForAuthorization() {
                    // Schedule the countdown timer
                } else {
                    // Handle unauthorized status
                }
            }
        }
    }

    private func checkForAuthorization() async -> Bool {
        switch manager.authorizationState {
        case .notDetermined:
            do {
                let state = try await manager.requestAuthorization()
                return state == .authorized
            } catch {
                print("Authorization error: \(error)")
                return false
            }
        case .authorized: return true
        case .denied: return false
        @unknown default: return false
        }
    }
}
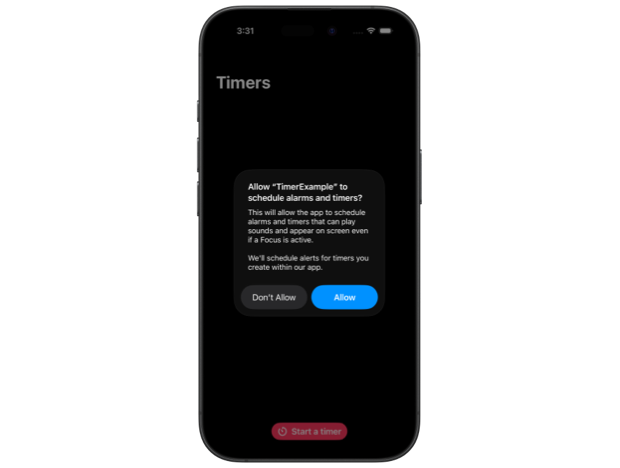
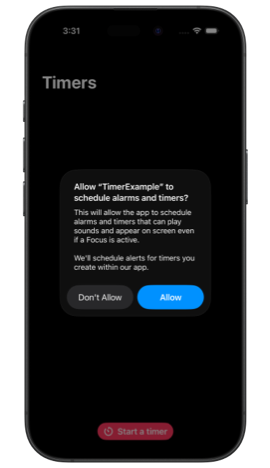
Calling requestAuthorization() in the .notDetermined branch triggers a system alert that shows Apple’s standard explanation of alarms and timers, followed by the custom text from NSAlarmKitUsageDescription.
If the user denies permission, we can’t schedule AlarmKit timers. Depending on the app, we can disable timer-related features and direct users to Settings to enable them, or fall back to another timing method. If the user grants permission, we can go ahead and schedule a timer with AlarmKit.
# Schedule a timer
Scheduling a timer is unfortunately not as straightforward as checking for authorization, because even the simplest configuration needs a bit of setup. Let’s go over it step by step.
First we need to describe the alert that appears when the timer finishes by creating an AlarmPresentation.Alert. It requires a title and a stopButton, and can optionally have a secondary button as well.
import SwiftUI
import AlarmKit

struct TimerButton: View {
    private let manager = AlarmManager.shared

    var body: some View {
        Button("Start a timer", systemImage: "timer") {
            Task {
                if await checkForAuthorization() {
                    await scheduleTimer()
                } else {
                    // Handle unauthorized status
                }
            }
        }
    }

    private func scheduleTimer() async {
        let alert = AlarmPresentation.Alert(
            title: "Ready!",
            stopButton: AlarmButton(
                text: "Done",
                textColor: .pink,
                systemImageName: "checkmark"
            )
        )
    }

    ...
}
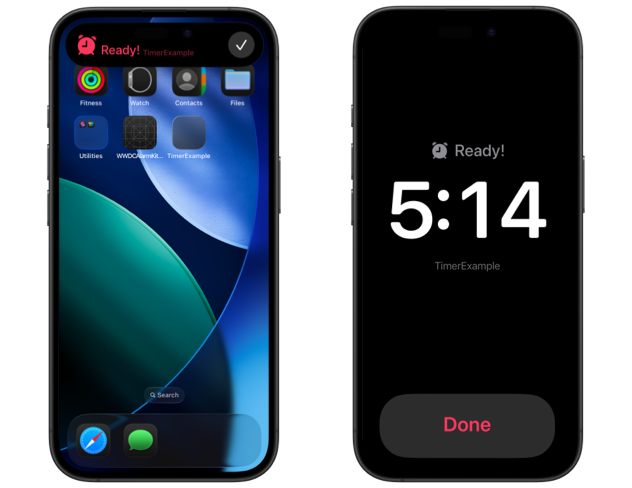
The alert appears in two sizes: a small banner when the timer ends while the device is unlocked and a larger one on the lock screen. We should keep the title short so it doesn't get truncated in the compact version.
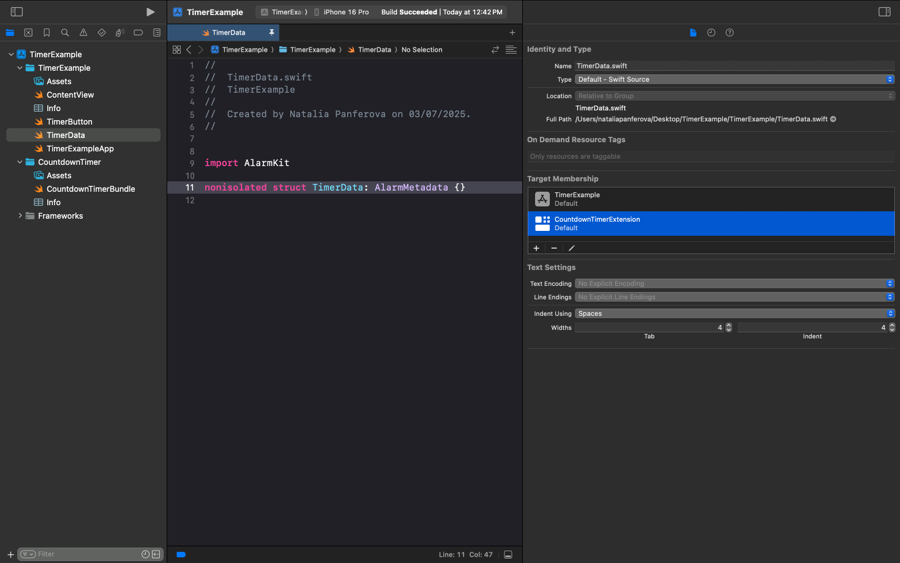
Once the alert is in place, we can create AlarmAttributes, which requires a presentation and a tintColor. The metadata parameter is optional, but AlarmAttributes is generic over Metadata, so we still need to provide a type that conforms to AlarmMetadata, even if it’s empty. Without that type the code won’t compile and we'll see the error Generic parameter 'Metadata' could not be inferred. In projects created with Xcode 26, where types are MainActor-isolated by default, we should mark our type as nonisolated to satisfy the protocol conformance.
import SwiftUI
import AlarmKit

nonisolated struct TimerData: AlarmMetadata {}

struct TimerButton: View {
    ...

    private func scheduleTimer() async {
        let alert = AlarmPresentation.Alert(
            title: "Ready!",
            stopButton: AlarmButton(
                text: "Done",
                textColor: .pink,
                systemImageName: "checkmark"
            )
        )

        let attributes = AlarmAttributes<TimerData>(
            presentation: AlarmPresentation(alert: alert),
            tintColor: .pink
        )
    }
}
Now we can finally start a timer by calling the schedule() method of AlarmManager and passing a configuration that includes the AlarmAttributes we defined earlier together with a duration. In this example we schedule a 30-second timer, but in a real app we would set the duration from context or let the user choose it.
import SwiftUI
import AlarmKit

nonisolated struct TimerData: AlarmMetadata {}

struct TimerButton: View {
    private let manager = AlarmManager.shared

    ...

    private func scheduleTimer() async {
        let alert = AlarmPresentation.Alert(
            title: "Ready!",
            stopButton: AlarmButton(
                text: "Done",
                textColor: .pink,
                systemImageName: "checkmark"
            )
        )

        let attributes = AlarmAttributes<TimerData>(
            presentation: AlarmPresentation(alert: alert),
            tintColor: .pink
        )

        do {
            let timerAlarm = try await manager.schedule(
                id: UUID(),
                configuration: .timer(
                    duration: 30,
                    attributes: attributes
                )
            )
        } catch {
            print("Scheduling error: \(error)")
        }
    }
}


Level up your Swift skills!$35
100+ tips to take your Swift code to the next level
Swift Gems
- Advanced Swift techniques for experienced developers bypassing basic tutorials
- Curated, actionable tips ready for immediate integration into any Swift project
- Strategies to improve code quality, structure, and performance across all platforms
Level up your Swift skills!
100+ tips to take your Swift code to the next level
Swift Gems
# Configure a countdown Live Activity
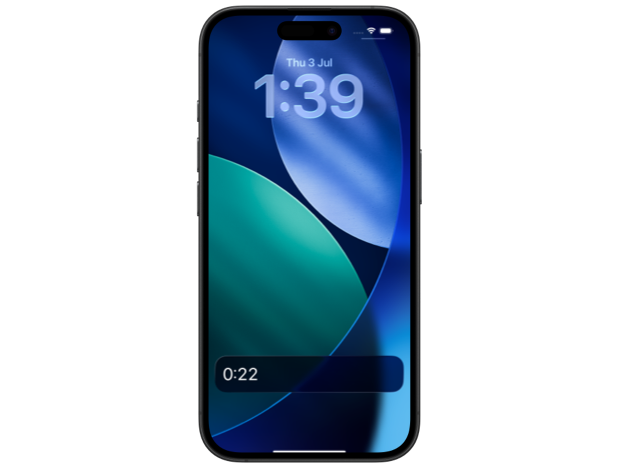
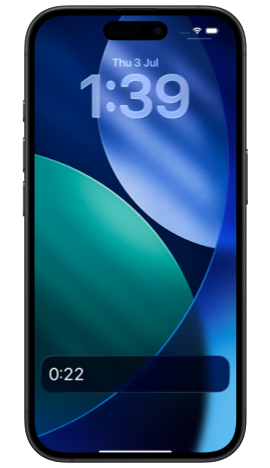
So far we've scheduled a timer and set up the alert presentation that appears when the timer ends. To display a continuous countdown while the timer is running, we need to set up a Live Activity that shows on the Lock Screen and in the Dynamic Island.
We'll need to add a Widget Extension target to our project and remove all the widget-related code, as we just need a Live Activity. The most basic starter configuration only requires a WidgetBundle declaration marked with @main and the Live Activity definition itself with an ActivityConfiguration using AlarmAttributes.
import WidgetKit
import SwiftUI
import AlarmKit

@main
struct CountdownTimerBundle: WidgetBundle {
    var body: some Widget {
        CountdownTimerLiveActivity()
    }
}

struct CountdownTimerLiveActivity: Widget {
    var body: some WidgetConfiguration {
        ActivityConfiguration(for: AlarmAttributes<TimerData>.self) { context in

        } dynamicIsland: { context in
            DynamicIsland {
                DynamicIslandExpandedRegion(.leading) {

                }
                DynamicIslandExpandedRegion(.trailing) {

                }
                DynamicIslandExpandedRegion(.bottom) {

                }
            } compactLeading: {

            } compactTrailing: {

            } minimal: {

            }
        }
    }
}
We also need to ensure that the TimerData declaration defined in the main application target is compiled into the Widget Extension. The simplest approach is to place it in a dedicated Swift file and assign that file to both targets.
The context provided inside the Live Activity contains the AlarmPresentationState, from which we can extract the countdown, create a timer-interval range, and pass it to a Text view. This text will be updating automatically as the seconds pass.
struct CountdownTimerLiveActivity: Widget {
    var body: some WidgetConfiguration {
        ActivityConfiguration(for: AlarmAttributes<TimerData>.self) { context in
            CountdownTextView(state: context.state)
                .font(.largeTitle)
                .padding()
        } dynamicIsland: { context in
            ...
        }
    }
}

struct CountdownTextView: View {
    let state: AlarmPresentationState

    var body: some View {
        if case let .countdown(countdown) = state.mode {
            Text(
                timerInterval: Date.now ... countdown.fireDate
            )
            .monospacedDigit()
            .lineLimit(1)
        }
    }
}
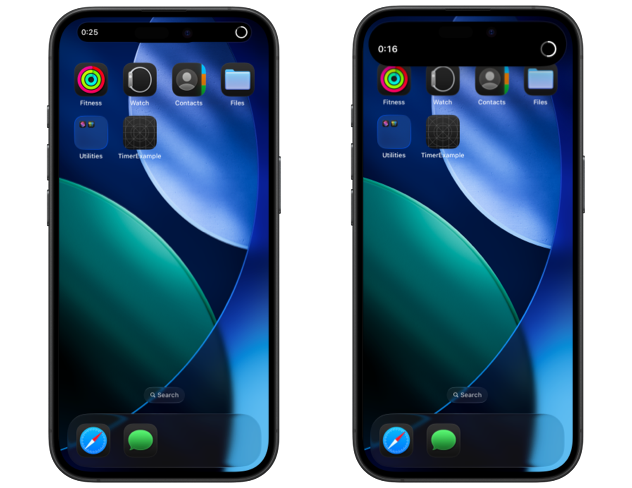
For the Dynamic Island presentation, we can either reuse the text countdown or choose a different approach. In this example we’ll define an additional progress view to explore a more compact alternative.
struct CountdownTimerLiveActivity: Widget {
    var body: some WidgetConfiguration {
        ActivityConfiguration(for: AlarmAttributes<TimerData>.self) { context in
            ...
        } dynamicIsland: { context in
            DynamicIsland {
                DynamicIslandExpandedRegion(.bottom) {
                    HStack {
                        CountdownTextView(state: context.state)
                            .font(.headline)
                        CountdownProgressView(state: context.state)
                            .frame(maxHeight: 30)
                    }
                }
            } compactLeading: {
                CountdownTextView(state: context.state)
            } compactTrailing: {
                CountdownProgressView(state: context.state)
            } minimal: {
                CountdownProgressView(state: context.state)
            }
        }
    }
}

struct CountdownProgressView: View {
    let state: AlarmPresentationState

    var body: some View {
        if case let .countdown(countdown) = state.mode {
            ProgressView(
                timerInterval: Date.now ... countdown.fireDate,
                label: { EmptyView() },
                currentValueLabel: { Text("") }
            )
            .progressViewStyle(.circular)
        }
    }
}
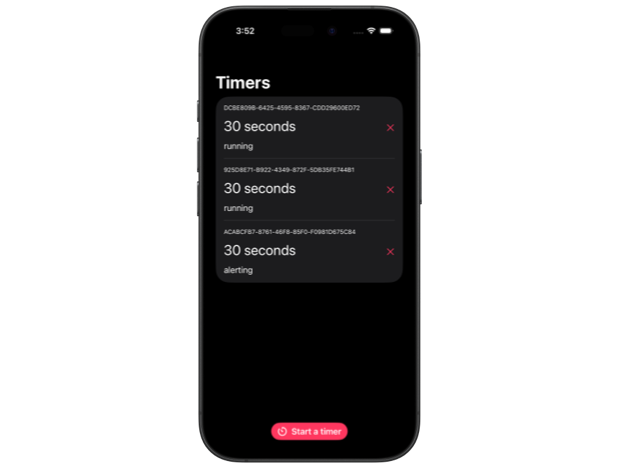
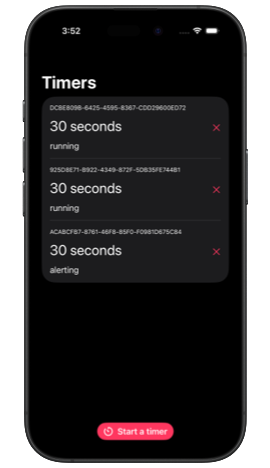
# Show active timers in the app
With scheduling and Live Activity presentation complete, the next logical step is to surface any timer that is currently running inside the foreground app itself.
AlarmKit provides a dedicated asynchronous sequence that emits the full set of active alarms every time the system adds, removes, or mutates one. By iterating over that sequence, we can keep local state in sync and render an up-to-date list.
struct TimerList: View {
    @State private var timerAlarms: [Alarm] = []

    var body: some View {
        List(timerAlarms) { alarm in
            TimerAlarmRow(alarm: alarm)
        }
        .task {
            for await alarms in AlarmManager.shared.alarmUpdates {
                timerAlarms.removeAll { local in
                    alarms.allSatisfy { $0.id != local.id }
                }

                for alarm in alarms {
                    if let index = timerAlarms.firstIndex(
                        where: { $0.id == alarm.id }
                    ) {
                        timerAlarms[index] = alarm
                    } else {
                        timerAlarms.insert(alarm, at: 0)
                    }
                }
            }
        }
    }
}
Every Alarm instance exposes just a few properties we can work with, such as its identifier, the countdown duration it was originally configured with, and its current state, such as countdown, alerting, or paused, if we support pausing. It doesn't report the live time-remaining value, that comes through the presentation state we used in the Live Activity, so the list can only display the static duration and the state label. The identifier, lets us cancel the alarm programmatically, so we can surface a cancel action in the app’s UI.
struct TimerAlarmRow: View {
    let alarm: Alarm

    var body: some View {
        HStack {
            VStack(alignment: .leading, spacing: 12) {
                Text("\(alarm.id)")
                    .font(.caption)

                if let countdown = alarm.countdownDuration?.preAlert {
                    let duration = Duration.seconds(countdown)
                    Text("\(duration, format: .units(width: .wide))")
                        .font(.title)
                }

                switch alarm.state {
                case .countdown: Text("running")
                case .alerting: Text("alerting")
                default: EmptyView()
                }
            }

            Spacer()

            Button(role: .cancel) {
                try? AlarmManager.shared.cancel(id: alarm.id)
            }
            .labelStyle(.iconOnly)
        }
    }
}
AlarmKit is a welcome addition, yet even the simplest end-to-end timer flow requires setting up several components: authorization, scheduling, Live Activity configuration, Dynamic Island presentation, and an in-app overview. In this post we walked through that baseline flow to see every step in context. The sample project I used is available on GitHub, so feel free to download it and experiment. There is still plenty to explore, for example adding secondary buttons to alerts or surfacing extra details carried in the metadata.
If you are after more Swift and SwiftUI reading, take a look at my books and book bundles, they provide detailed guides and practical tips to deepen your understanding of both the Swift language and the SwiftUI framework.

Work with SwiftUI. Not against it.$35
A field guide to SwiftUI patterns and anti-patterns
The SwiftUI Way
- Avoid common SwiftUI pitfalls
- Build deeper intuition for the framework
- Gain insights from a former SwiftUI Engineer at Apple
Work with SwiftUI. Not against it.
A field guide to SwiftUI patterns and anti-patterns
The SwiftUI Way