

iOS app setup for remote push notifications
Remote push notifications are messages that app developers can send to users directly on their devices from a remote server. These notifications can appear even if the app is not open, making them a powerful tool for re-engaging users or delivering timely information. They are different from local notifications, which are scheduled and triggered by the app itself on the device.
Adding remote notifications capability to an iOS app is a quite involved process that includes several steps and components. This post will walk you through all the necessary setup so that you can enable remote push notification functionality in your iOS project.
Note that to be able to fully configure and test remote push notifications, you will need an active Apple developer account.
# App ID configuration
To configure your app ID with push capabilities, go to Certificates, Identifiers & Profiles in your Apple developer account, create a new app ID or choose an existing one that corresponds to your project where you are adding push notifications support.
Make sure that the "Push Notifications" capability is selected.

# Push certificate
If you don't have a push notifications key associated with your developer account yet under Certificates, Identifiers & Profiles, then you will need to create one.
Name it "Push Notification Key" and make sure to check the "Apple Push Notifications service (APNs)" checkbox.
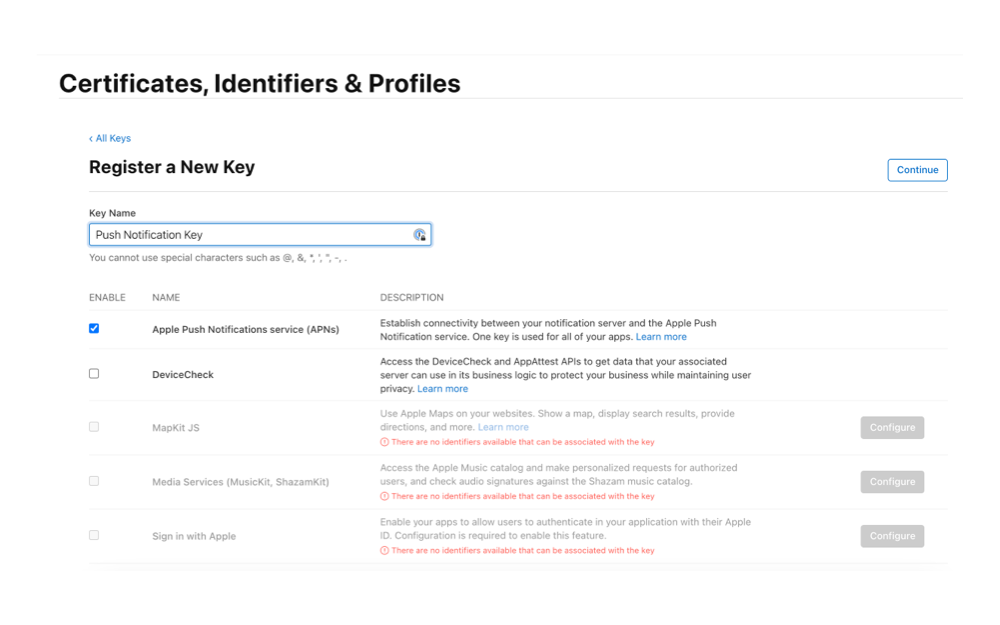
Once created, download the key and keep it somewhere safe. You will need this key to connect to APNs from your server when you are ready to send remote push notifications to your app users.


Level up your Swift skills!$35
100+ tips to take your Swift code to the next level
Swift Gems
- Advanced Swift techniques for experienced developers bypassing basic tutorials
- Curated, actionable tips ready for immediate integration into any Swift project
- Strategies to improve code quality, structure, and performance across all platforms
Level up your Swift skills!
100+ tips to take your Swift code to the next level
Swift Gems
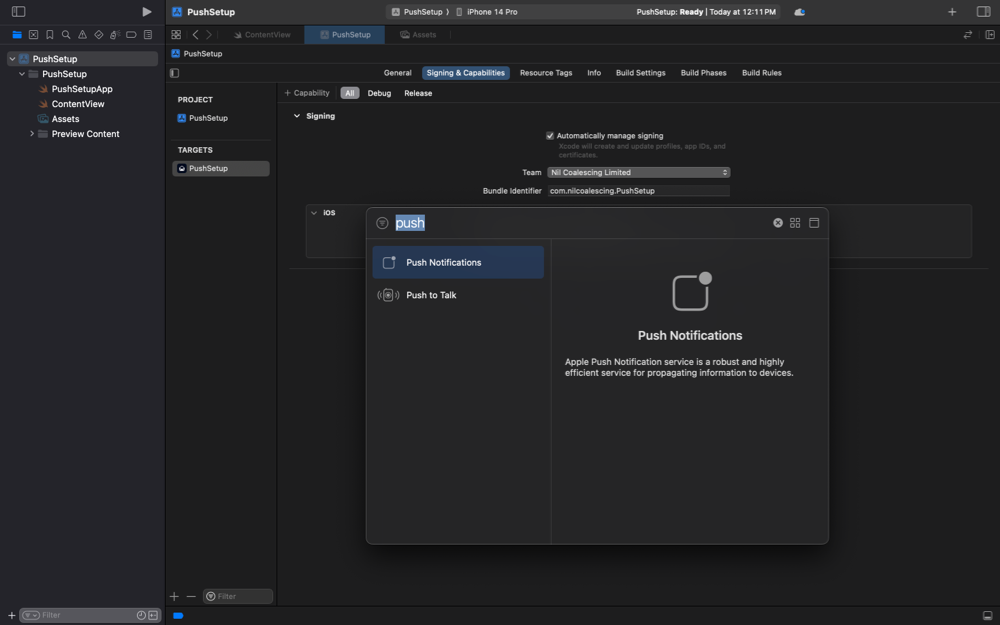
# Xcode project configuration
Open your Xcode project and go to the project settings. In "Signing and Capabilities" settings add the "Push Notifications" capability.
# Requesting user permission
This step is only necessary if you are going to send alert push notifications, sometimes called foreground notifications. These display an alert, sound, or a badge on the app's icon and used to inform users of new content, updates, or other important information that requires immediate attention. Background push notifications or sometimes called silent notifications don't require user permission as they are not visible to the user and are not disruptive. They are great for updating content, syncing data, or performing maintenance tasks without interrupting the user.
To be able to show alerts on the user’s device we first need to ask for permission. We should do it in response to a user action so that they are not surprised by the shown dialog. It’s important that the user has the context to understand why the app needs authorization for notifications.
We can request permission with the following code.
Task {
    let center = UNUserNotificationCenter.current()
    let success = try await center.requestAuthorization(options: [.alert])

    if success {
        // proceed with registration
    }
}
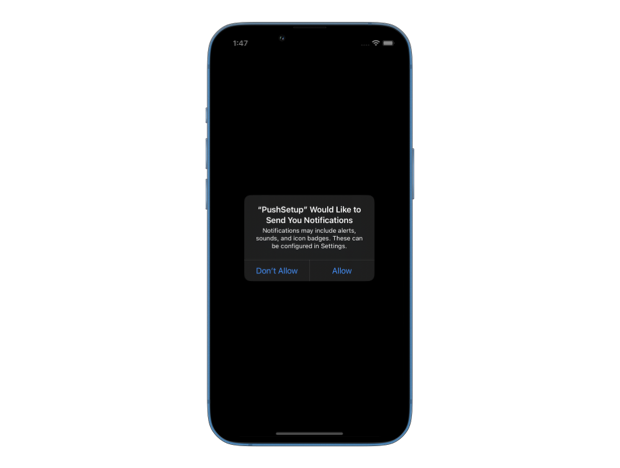
The system prompts the user to grant or deny the request the first time, subsequent requests don't prompt the user. Once we obtain the user authorization we can proceed to register our app to receive remote push notifications.
# Registering for push notifications
To get the device token from APNs we need to register for remote push notifications. This can be done after getting user permission for alerts. It should also be done on every app start, because old tokens can be no longer valid.
If your app uses the SwiftUI app lifecycle you'll need to add an application delegate to your project. With the UIKit lifecycle you can just use your existing UIApplicationDelegate.
In a SwiftUI app create a new file called AppDelegate.swift, declare a class conforming to UIApplicationDelegate and add application(_:didFinishLaunchingWithOptions:) method. If you are planning to send alerts rather than background push notifications, then make sure to check for notifications authorization status on the user's device before registering.
import UIKit
import UserNotifications

class AppDelegate: NSObject, UIApplicationDelegate {
    func application(
        _ application: UIApplication,
        didFinishLaunchingWithOptions launchOptions: [
            UIApplication.LaunchOptionsKey: Any
        ]?
    ) -> Bool {
        Task {
            let center = UNUserNotificationCenter.current()
            let authorizationStatus = await center
                .notificationSettings().authorizationStatus

            if authorizationStatus == .authorized {
                await MainActor.run {
                    application.registerForRemoteNotifications()
                }
            }
        }
        return true
    }
}
To connect the app delegate to the SwiftUI app lifecycle we need to use the UIApplicationDelegateAdaptor property wrapper. Add your delegate like in the following code to your app struct to insure that the application launch code is called.
@main
struct PushSetupApp: App {
    @UIApplicationDelegateAdaptor(AppDelegate.self)
    private var appDelegate

    var body: some Scene {
        WindowGroup {
            ContentView()
        }
    }
}
Enhance older apps with SwiftUI!$40
A detailed guide on gradually adopting SwiftUI in UIKit projects
Updated for iOS 26 and Xcode 26!
Integrating SwiftUI into UIKit Apps
- Upgrade your apps with new features like Swift Charts and Widgets
- Support older iOS versions with effective backward-compatible strategies
- Seamlessly bridge state and data between UIKit and SwiftUI using the latest APIs
Enhance older apps with SwiftUI!
A detailed guide on gradually adopting SwiftUI in UIKit projects
Integrating SwiftUI
into UIKit Apps
Updated for iOS 26 and Xcode 26!
# Handling the device token
Once registered, the app will receive a device token which needs to be sent to your backend server. This token will be used by your server to send notifications to this specific device.
To retrieve the token add the application(_:didRegisterForRemoteNotificationsWithDeviceToken:) method to your app delegate. Depending on what your server expects, you might need to convert the token to a string before sending it. Either way, it will be useful to have it in a string format for testing.
class AppDelegate: NSObject, UIApplicationDelegate {
    func application(
        _ application: UIApplication,
        didRegisterForRemoteNotificationsWithDeviceToken deviceToken: Data
    ) {
        let token = deviceToken.reduce("") { $0 + String(format: "%02x", $1) }
        print("device token: \(token)")

        // send the token to your server
    }
}
# Testing remote push notifications
At this point your app is configured to receive basic push notifications. You will need to go through additional setup steps if you want to support rich push notifications with images, actions buttons, deep links or custom UI. I may cover these later in future posts.
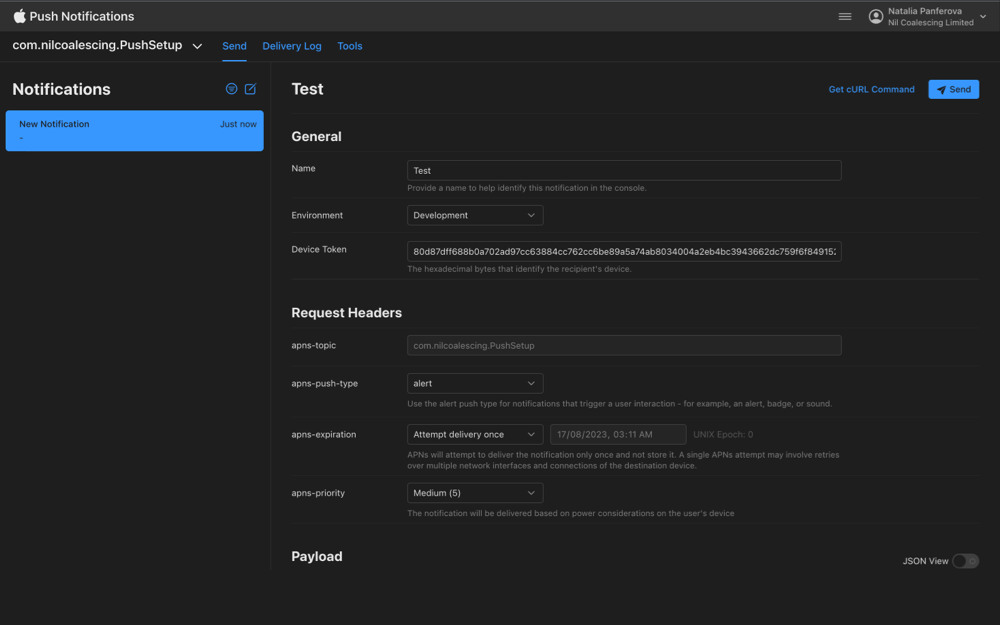
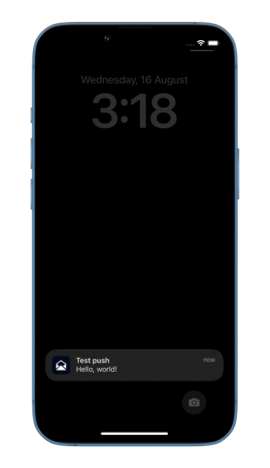
To test that the basic setup is working properly we can use the new Push Notifications Console from Apple to send ourselves a test push.
Once you open the console, select your app ID in the top left corner and create a test push notification. To target your test device or simulator, you can copy the printed device token and paste it in the "Device Token" field of the notification form.
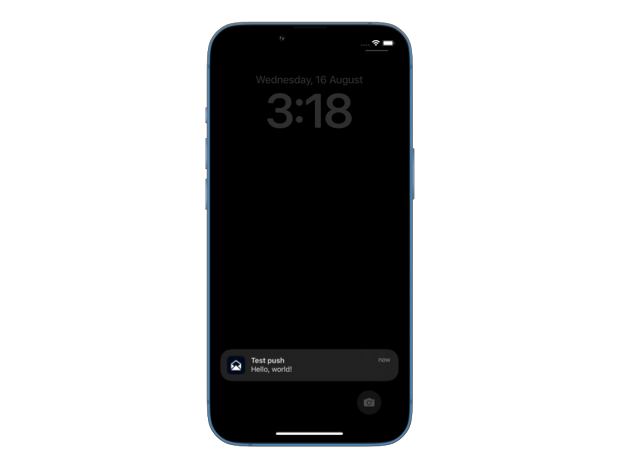
If everything goes well you should receive your test push notification on your target device.
Note that by default push notifications will only be shown if your app is not running in the foreground. If you do want to receive notifications while in the foreground, you should look into implementing userNotificationCenter(_:willPresent:withCompletionHandler:) method.
Deepen your understanding of SwiftUI!$35
The essential guide to SwiftUI core concepts and APIs
SwiftUI Fundamentals
- Explore the key APIs and design patterns that form the foundation of SwiftUI
- Develop a deep, practical understanding of how SwiftUI works under the hood
- Learn from a former Apple engineer who worked on widely used SwiftUI APIs
Deepen your understanding of SwiftUI!
The essential guide to SwiftUI core concepts and APIs
SwiftUI Fundamentals