

Notification action buttons with images in iOS
Action buttons are a vital part of the iOS notification system, allowing users to interact with notifications directly from the home screen. According to Apple documentation, these buttons can be used to trigger specific actions within an app without needing to open the app itself.
The User Notifications framework provides several types of actions, including:
- Generic Actions: These can be used for any purpose and are often used to open the app or perform a task.
- Text Input Actions: These allow the user to respond with text directly from the notification.
- Destructive Actions: These are used for actions that might change or delete data and are usually styled to warn the user.
Starting from iOS 15, Apple has taken notification actions a step further by allowing developers to include images in these buttons.
# Adding images to notification actions
To add an image to a notification action we can first declare it using the UNNotificationActionIcon class. Icons can be created using either a system symbol or a an image in your app’s bundle.
let likeActionIcon = UNNotificationActionIcon(systemImageName: "hand.thumbsup")
To assign the image to an action button, we'll use the UNNotificationAction initializer that accepts an icon.
let likeAction = UNNotificationAction(
    identifier: "new_comment_category.like_action",
    title: "Like",
    options: UNNotificationActionOptions.foreground,
    icon: likeActionIcon
)
Finally, we'll assign the action to a notification category.
let newCommentCategory = UNNotificationCategory(
      identifier: "new_comment_category",
      actions: [likeAction, dislikeAction],
      intentIdentifiers: []
)
Don't forget to register your category on application launch.
let notificationCenter = UNUserNotificationCenter.current()
notificationCenter.setNotificationCategories([
    newCommentCategory,
    ...
])
And make sure to handle all of the notification actions that you declared inside userNotificationCenter(_:didReceive:withCompletionHandler:) delegate method.
# Testing notifications on the simulator
We can easily test if our action buttons appear as expected when the notification arrives locally on an iOS simulator or by sending a remote push with the new Push Notifications Console from Apple.
To quickly test the notification appearance locally, create a test.apn file with the payload. Make sure to include the notification category that contains the buttons with icons.
{
   "aps": {
      "category" : "new_comment_category",
      "alert" : {
         "title" : "New comment on your post",
         "body" : "Great work!"
      }
   }
}
Run your app on the iOS simulator. In the terminal go to the directory where you saved the test.apn file and run xcrun simctl push booted com.nilcoalescing.MyApp test.apn replacing com.nilcoalescing.MyApp with your app bundle ID.
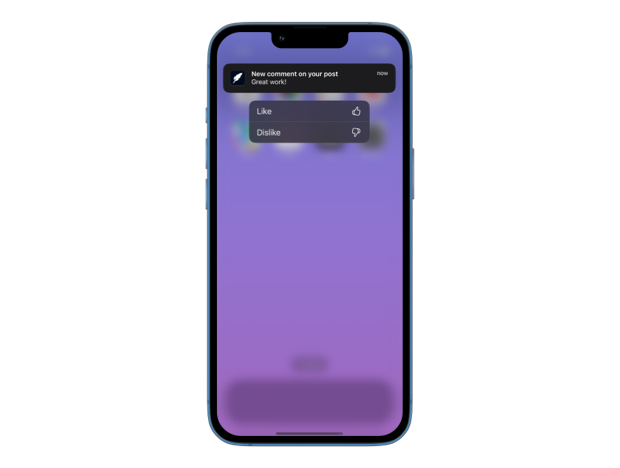
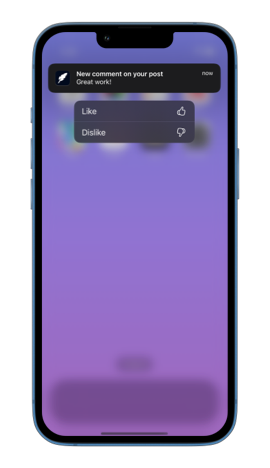
Long press on the notification that appears in the simulator and check if the action buttons show the text and the icons that you provided.
If you're an experienced Swift developer looking to level up your skills, take a look at my book Swift Gems. It offers 100+ advanced Swift tips, from optimizing collections and leveraging generics, to async patterns, powerful debugging techniques, and more - each designed to make your code clearer, faster, and easier to maintain.


Level up your Swift skills!$35
100+ tips to take your Swift code to the next level
Swift Gems
- Advanced Swift techniques for experienced developers bypassing basic tutorials
- Curated, actionable tips ready for immediate integration into any Swift project
- Strategies to improve code quality, structure, and performance across all platforms
Level up your Swift skills!
100+ tips to take your Swift code to the next level
Swift Gems