

SwiftUI Environment
SwiftUI provides a powerful mechanism called the environment, allowing data to be shared across views in a view hierarchy. This is particularly useful when we need to pass data or configuration information from a parent view down to its children, even if they’re many levels deep. It enhances the flexibility of SwiftUI views and decouples the data source from its destination.
SwiftUI includes a predefined list of values stored in the EnvironmentValues struct. These values are populated by the framework based on system state and characteristics, user settings or sensible defaults. We can access these predefined values to adjust the appearance and behavior of custom SwiftUI views, and we can also override some of them to influence the behavior of built-in views. Additionally, we can define our own custom values by extending the EnvironmentValues struct.
In this post, we'll explore various ways to work with the SwiftUI environment, including reading and setting predefined values, creating custom environment keys, and using the environment to pass down actions and observable classes.
# Reading environment values
SwiftUI provides a convenient way to read values stored in the EnvironmentValues structure using the @Environment property wrapper.
For example, we can get the vertical size class of the user interface by specifying the verticalSizeClass key path. The value stored in this property is of type UserInterfaceSizeClass, and it informs our view about the amount of available vertical space based on the device type and orientation. SwiftUI automatically sets this value by considering factors like whether the device is an iPhone, iPad, or another screen size, and whether the device is in portrait or landscape mode.
struct ContentView: View {
    @Environment(\.verticalSizeClass)
    private var verticalSizeClass

    var body: some View {
        VStack {
            Text("Good morning!")
                .font(.largeTitle)
            if verticalSizeClass == .regular {
                Image("sunrise")
            }
        }
        .padding()
    }
}
In this example, we check the verticalSizeClass to determine whether the view has enough vertical space to display an additional image. If the size class is regular, the image will appear.
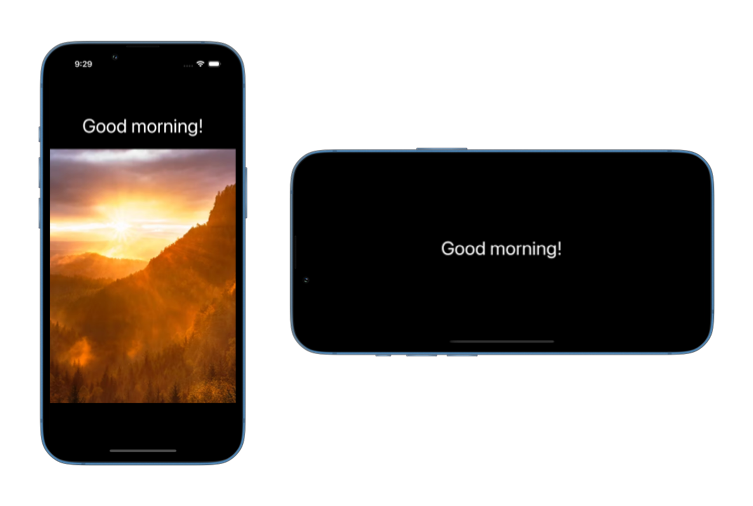
Reading environment values provided by SwiftUI helps us build flexible and adaptive UIs without hardcoding assumptions about the device or user preferences.
# Setting environment values
We can set or override some environment values using the environment() view modifier. This modifier allows us to define settings or configurations that automatically apply to a group of views. For example, we might use it to change text formatting, line limits, or layout behavior across multiple views. Note that not all environment values can be written to, some values are read-only and are managed by the system.
When we set an environment value, it affects all child views of the view where the modifier is applied, unless overridden later in the hierarchy.
struct ContentView: View {
    var body: some View {
        VStack(spacing: 30) {
            Text("Welcome to SwiftUI")
                .font(.title)
            Text("SwiftUI is a powerful UI framework.")
                .font(.body)
        }
        .padding()
        .multilineTextAlignment(.center)
        .environment(\.textCase, .uppercase)
    }
}
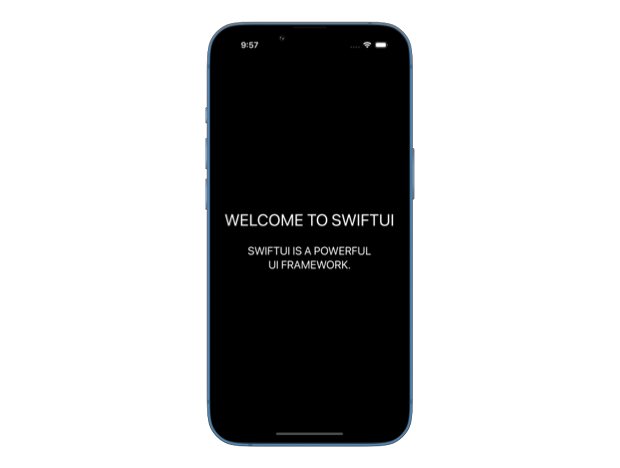
In this example, the textCase environment value is set to uppercase for all views within the VStack. As a result, both text views will display their content in uppercase letters. If needed, this setting can be overridden for specific child views by applying a different value at a lower level in the hierarchy.
# Custom environment values
SwiftUI lets us define custom environment values to share our own data across views in a flexible way. This allows us to inject values into the view hierarchy, so child views can access them without needing to pass properties manually. We can do this by extending the EnvironmentValues structure and defining a new property using the @Entry macro. Note that to be able to use @Entry, you'll need to build your apps with Xcode 16 or newer.
Imagine we are building an app where different views behave differently based on the user's role. We can create a custom environment value that holds the user role.
enum UserRole {
    case admin, regular, guest
}

extension EnvironmentValues {
    @Entry var userRole: UserRole = .guest
}
We can then set the user role on the application level and every view can read it from the environment.
@main
struct MyApp: App {
    var body: some Scene {
        WindowGroup {
            ContentView()
                .environment(\.userRole, .admin)
        }
    }
}

struct ContentView: View {
    var body: some View {
        UserRoleView()
    }
}

struct UserRoleView: View {
    @Environment(\.userRole)
    private var userRole

    var body: some View {
        Text("Current role: \(userRole)")
            .font(.title)
    }
}
Using custom environment values makes it easy to manage context-specific information without cluttering our view with manually passed properties.
# Environment-based view modifiers
SwiftUI offers dedicated methods on the View struct to set environment values, which make our code more readable and concise. Instead of using the environment() modifier directly, these dedicated methods provide a cleaner and more expressive way to set environment values.
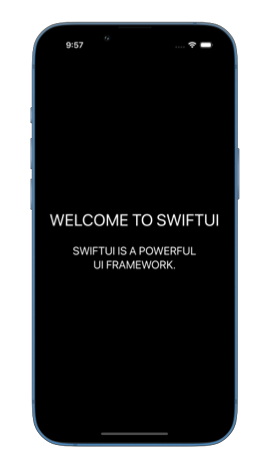
For instance, rather than setting the textCase environment value manually by applying environment(\.textCase, .uppercase) to a view, we can use the built-in textCase() modifier. Under the hood, it still works exactly the same way and passes the value down the view hierarchy and sets it for all the Text views, unless it's overridden further down the stack.
struct ContentView: View {
    var body: some View {
        VStack(spacing: 30) {
            Text("Welcome to SwiftUI")
                .font(.title)
            Text("SwiftUI is a powerful UI framework.")
                .font(.body)
        }
        .padding()
        .multilineTextAlignment(.center)
        .textCase(.uppercase)
    }
}
To follow the same API design, we can define such view modifiers to set custom environment values as well.
extension View {
    func userRole(_ role: UserRole) -> some View {
        environment(\.userRole, role)
    }
}
This custom method encapsulates the process of setting the userRole environment value, making it easier to use in different parts of the app.
@main
struct MyApp: App {
    var body: some Scene {
        WindowGroup {
            ContentView()
                .userRole(.admin)
        }
    }
}
# Actions in SwiftUI environment
In addition to environment values, SwiftUI also injects certain actions into the environment, allowing views to perform specific tasks, such as opening a URL or dismissing a modal. These actions are defined as structs that behave like functions because they use Swift’s callAsFunction() feature. This makes them simple to use, as you can interact with them like regular functions, even though they are structs. You can learn more about this Swift feature in my book Swift Gems.


Level up your Swift skills!$35
100+ tips to take your Swift code to the next level
Swift Gems
- Advanced Swift techniques for experienced developers bypassing basic tutorials
- Curated, actionable tips ready for immediate integration into any Swift project
- Strategies to improve code quality, structure, and performance across all platforms
Level up your Swift skills!
100+ tips to take your Swift code to the next level
Swift Gems
One commonly used action is the OpenURLAction, which allows us to open a URL in the default browser or another app. We can access it via the openURL environment value and call it with the URL we want to open.
struct ContentView: View {
    @Environment(\.openURL) private var openURL

    private let url = URL(string: "https://www.example.com")!

    var body: some View {
        Button("Check out our website") {
            openURL(url)
        }
    }
}
We can also override the default OpenURLAction in the environment if we need to customize its behavior. For example, we can create an action that processes the URL before it's opened, logs the link click, or navigates to a different screen in the app, instead of opening the link in a browser. This is particularly useful when we want to define custom behavior for links embedded within text views.
struct ContentView: View {
    var body: some View {
        Text("Check out [our policy](https://example.com) for more details.")
            .environment(\.openURL, OpenURLAction { url in
                handleURL(url)
                return .handled
            })
    }

    func handleURL(_ url: URL) {
        // handle URL here
        print("Link clicked: \(url.absoluteString)")
    }
}
In this example, we customize the openURL environment to call handleURL() whenever the link is clicked, allowing us to handle the URL in a specific way.
# Using environment for observable classes
With iOS 17 and the introduction of the Observation framework, SwiftUI’s environment has become even more versatile, allowing us to pass reference types marked with @Observable through the environment. Before iOS 17, the environment was primarily used for value types. If we needed to pass a class that conformed to ObservableObject, we had to use the dedicated environmentObject() modifier and access it with the @EnvironmentObject property wrapper. Now, with the enhanced environment support in iOS 17, we can use the environment() modifier to pass a reference type directly and read it using the @Environment property wrapper.
Here’s an example of how to pass an observable class through the environment:
import SwiftUI
import Observation

@Observable
class DataModel {
    var count = 0
}

@main
struct MyApp: App {
    @State
    private var dataModel = DataModel()

    var body: some Scene {
        WindowGroup {
            ContentView()
                .environment(dataModel)
        }
    }
}

struct ContentView: View {
    var body: some View {
        IncrementCountView()
            .padding()
    }
}

struct IncrementCountView: View {
    @Environment(DataModel.self)
    private var dataModel

    var body: some View {
        VStack(spacing: 10) {
            Button("Increment") {
                dataModel.count += 1
            }
            Text("Count: \(dataModel.count)")
        }
    }
}
In this example, we define a DataModel class that will be used across multiple views. We initialize our data model at the top level of the app and make it available to all child views using the environment() modifier. In IncrementCountView, we then access the shared DataModel instance using the @Environment property wrapper with the object type, instead of a key path.
This new approach simplifies passing reference types through the environment, making it easier to share data models across views in a clean and consistent way.
The SwiftUI environment is a powerful way to share data and configurations across our views. We can read predefined values from the EnvironmentValues struct to adjust our views or override them to customize built-in components. We can also define our custom values to avoid cluttering our code with extra properties and create additional view methods to make it easier to set those values in the hierarchy. The environment also gives us access to system actions, like opening URLs, and allows us to customize their behavior. Finally, starting from iOS 17, we can use these same mechanisms to pass down reference types, simplifying state management throughout the app.
If you are looking to build a strong foundation in SwiftUI, my book SwiftUI Fundamentals takes a deep dive into the framework's core principles and APIs to help you understand how it works under the hood and how to use it effectively in your projects. And my new book The SwiftUI Way helps you adopt recommended patterns, avoid common pitfalls, and use SwiftUI's native tools appropriately to work with the framework rather than against it.
For more resources on Swift and SwiftUI, check out my other books and book bundles.

Work with SwiftUI. Not against it.$35
A field guide to SwiftUI patterns and anti-patterns
The SwiftUI Way
- Avoid common SwiftUI pitfalls
- Build deeper intuition for the framework
- Gain insights from a former SwiftUI Engineer at Apple
Work with SwiftUI. Not against it.
A field guide to SwiftUI patterns and anti-patterns
The SwiftUI Way