

iOS keyboard shortcuts in SwiftUI on iOS 13
With the iPad getting more and more powerful and with the introduction of the new iPad keyboards with trackpad, it is really important to make sure that our apps work nicely with a hardware keyboard attached. In order to provide a smooth user experience, we should consider adding keyboard shortcuts for actions and navigation in our apps.
In this article we will look into how to add keyboard shortcuts to an iOS app written in SwiftUI.
On iOS 13 there is no equivalent of UIKeyCommand in SwiftUI and no way to add key commands directly to SwiftUI views. After some research we found that the best way for us to add the shortcuts was to subclass the UIHostingController and override its keyCommands property.
We will look at an example app that shows a list of the most populous New Zealand cities. The user can add and remove cities from the list and select a city to view the description. The full code for the project can be found in our GitHub folder for this article. Here we will go through the part related to the keyboard shortcuts.
# Subclass UIHostingController
We start by creating a subclass of UIHostingController that will be used as the root controller. It will accept the class responsible for data management in our app CityProvider and our SwiftUI root view.
class RootViewController<Content: View>: UIHostingController<Content> {
    let cityProvider: CityProvider

    init(rootView: Content, cityProvider: CityProvider) {
        self.cityProvider = cityProvider
        super.init(rootView: rootView)
    }
}
In SceneDelegate.swift we initialize our RootViewController passing it the SwiftUI ContentView as the rootView. Then, assign it to the rootViewController property of the SceneDelegate window.
class SceneDelegate: UIResponder, UIWindowSceneDelegate {
    var window: UIWindow?

    func scene(
        _ scene: UIScene, willConnectTo session: UISceneSession,
        options connectionOptions: UIScene.ConnectionOptions
    ) {
        let cityProvider = CityProvider()
        let contentView = ContentView(cityProvider: cityProvider)

        if let windowScene = scene as? UIWindowScene {
            let window = UIWindow(windowScene: windowScene)

            let rootViewController = RootViewController(
                rootView: contentView,
                cityProvider: cityProvider
            )

            window.rootViewController = rootViewController
            self.window = window
            window.makeKeyAndVisible()
        }
    }
}
# Define keyboard shortcuts
Now we need to define the keyboard shortcuts that our app supports. We create a list of UIKeyCommands and return it from the RootViewController's keyCommands computed property.
Our app will have a keyboard shortcut to add a new city. We have a limited number of cities that the user can add to the list, so the shortcut should only be available when not all of the cities have been added yet. We can define the logic for adding a particular shortcut inside keyCommands and return a different list of commands depending on the app state.
class RootViewController<Content: View>: UIHostingController<Content> {
    let cityProvider: CityProvider

    override var keyCommands: [UIKeyCommand]? {
        var result: [UIKeyCommand] = []

        if cityProvider.addedCities.count < cityProvider.cities.count {
            result.append(
                UIKeyCommand(
                    action: #selector(addCity),
                    input: "N",
                    modifierFlags: [.shift, .command],
                    discoverabilityTitle: "New City"
                )
            )
        }

        return result
    }
}

extension UIKeyCommand {
    convenience init(
        action: Selector, input: String,
        modifierFlags: UIKeyModifierFlags,
        discoverabilityTitle: String
    ) {
        self.init(
            title: "", image: nil, saction: action,
            input: input, modifierFlags: modifierFlags,
            propertyList: nil, alternates: [],
            discoverabilityTitle: discoverabilityTitle,
            attributes: [], state: .on
        )
    }
}
We wrote a convenience initializer for UIKeyCommand because in our example we don't need all of the properties that the designated initializer accepts.
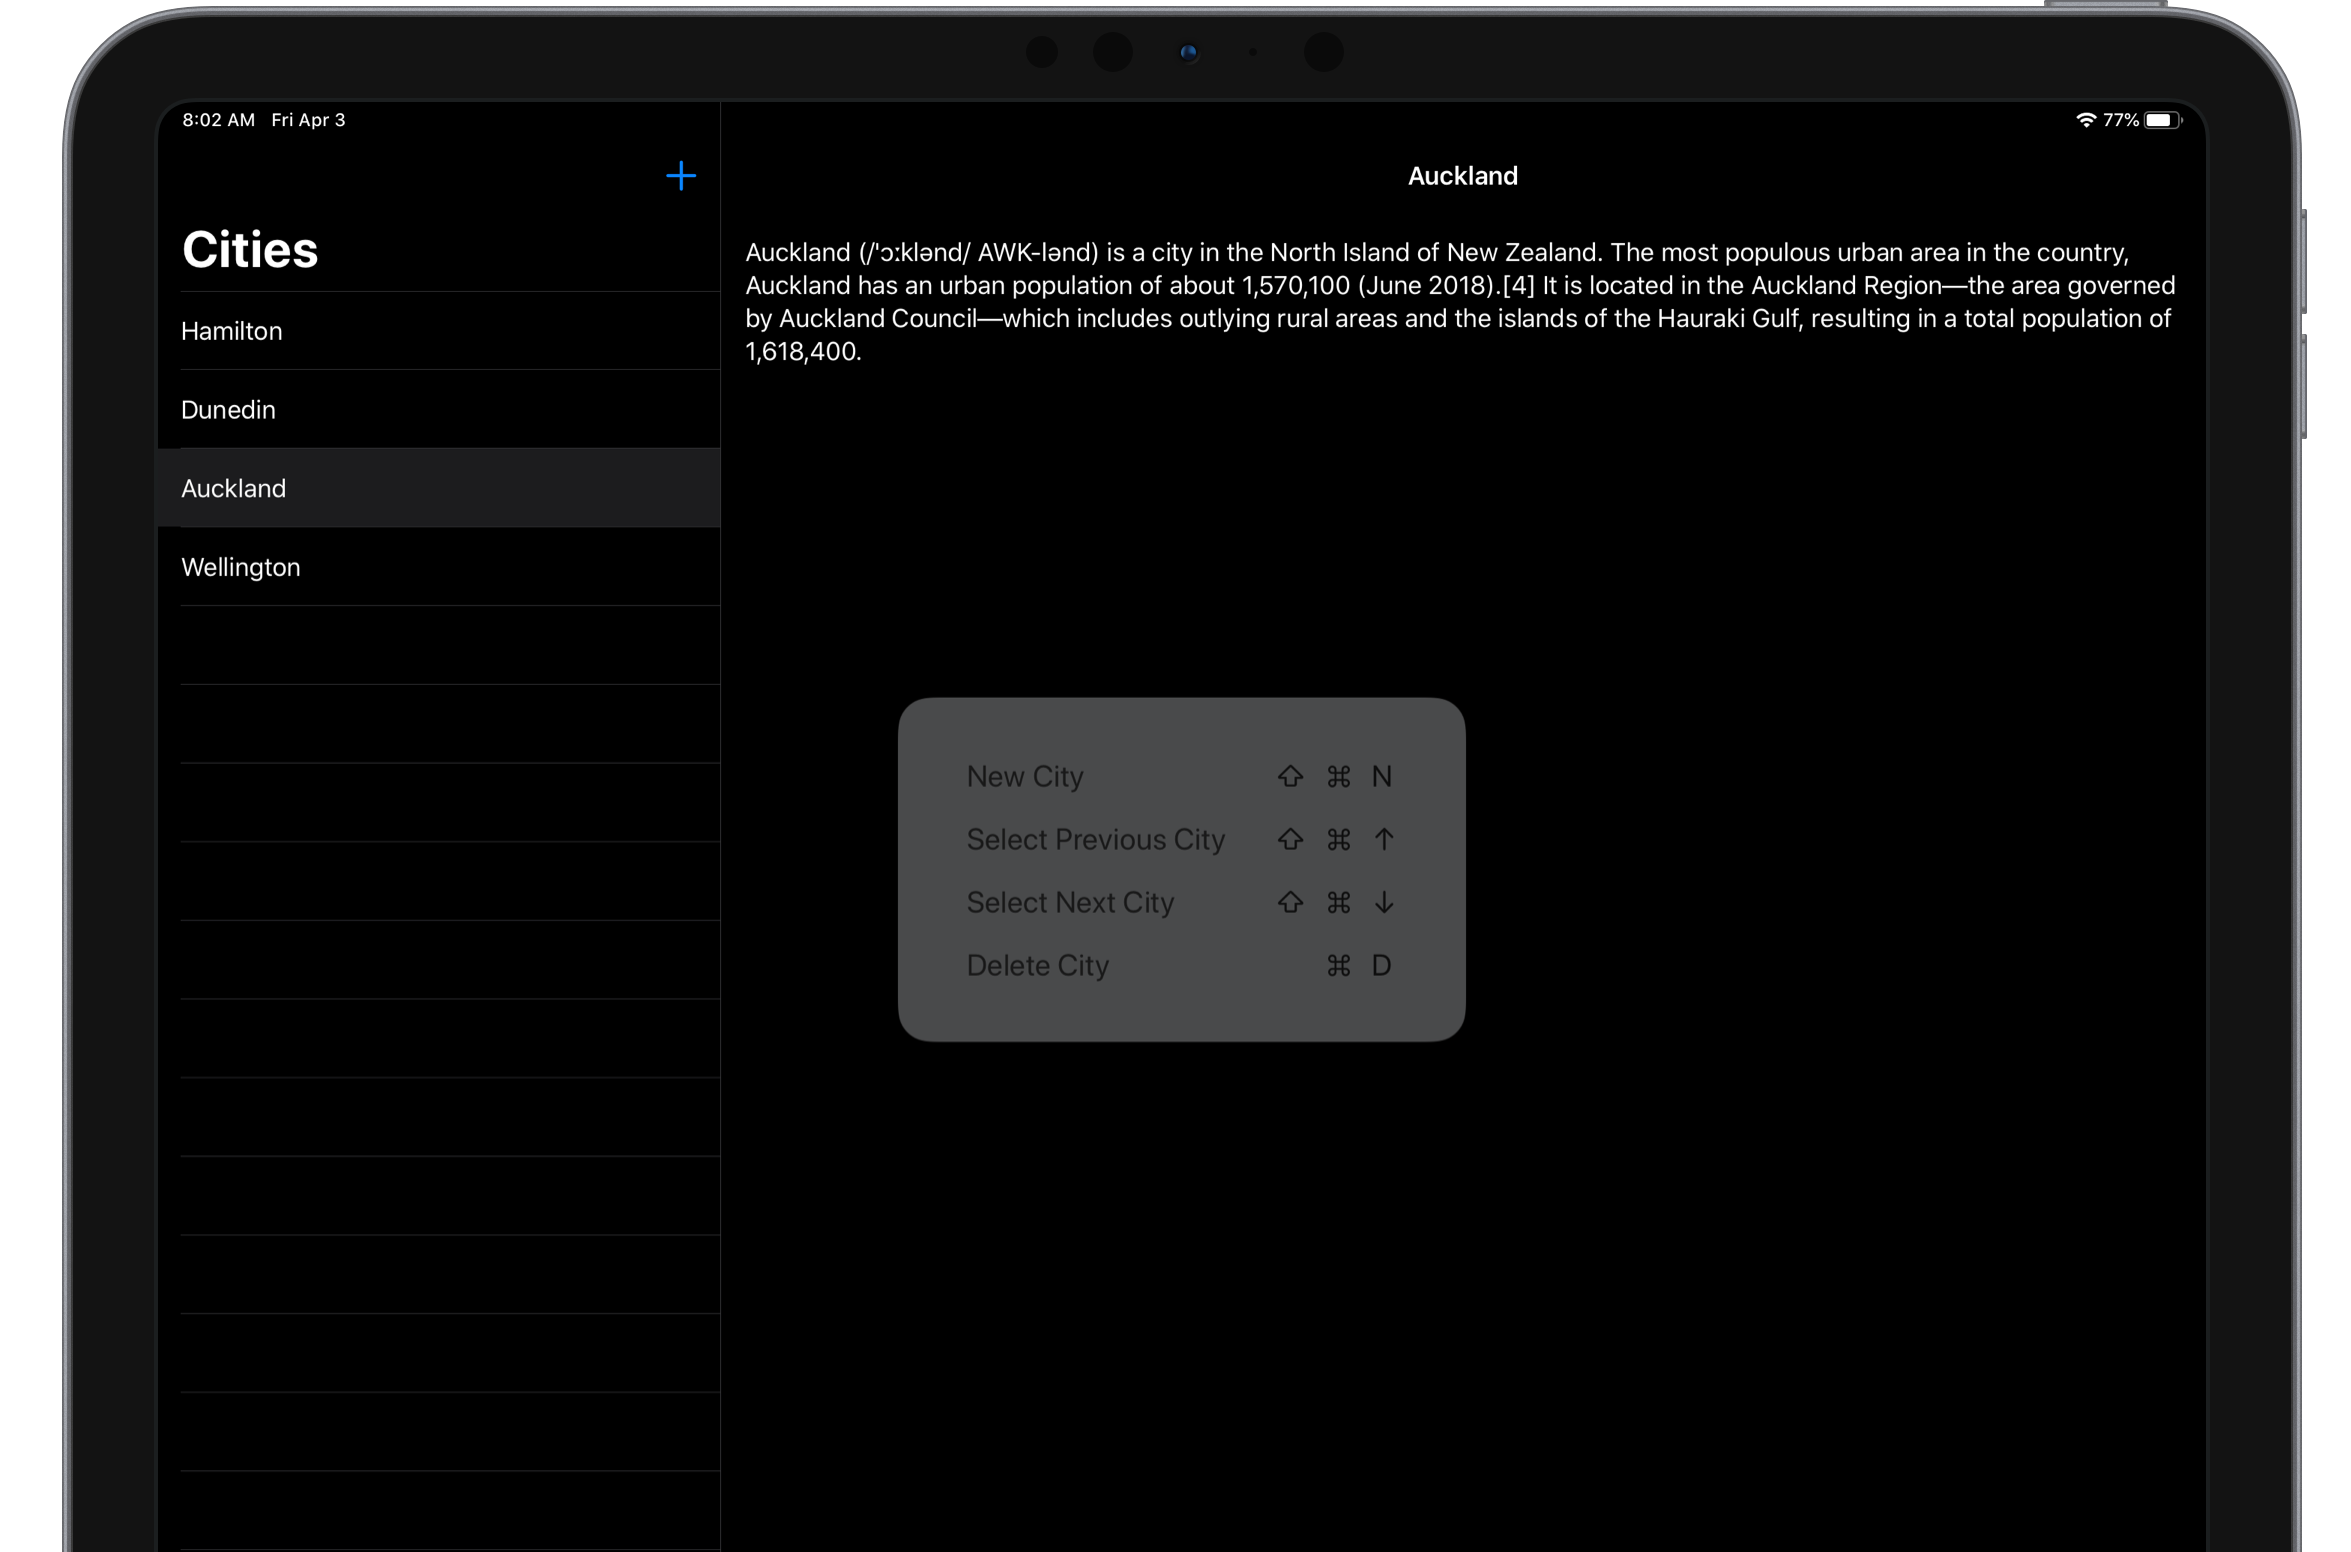
To discover what keyboard shortcuts are available the user can press and hold the command ⌘ key. The app will show a popup listing the available commands taking into account the current state of the app and the logic we defined inside keyCommands property. The discoverabilityTitle that we pass into the UIKeyCommand initializer will be used in that popup to explain what the command does.


WWDC 2026 offer: 30% off!$35$25
100+ tips to take your Swift code to the next level
Swift Gems
- Advanced Swift techniques for experienced developers bypassing basic tutorials
- Curated, actionable tips ready for immediate integration into any Swift project
- Strategies to improve code quality, structure, and performance across all platforms
100+ tips to take your Swift code to the next level
Swift Gems
# Perform keyboard shortcut actions
The action to perform when the command is triggered has to be @objc method. We will define it inside the RootViewController and then pass it on to our data management layer (which for this app is the CityProvider).
@objc func addCity() {
    cityProvider.addCity()
}
Our SwiftUI ContentView then will observe the CityProvider and layout the views accordingly.
struct ContentView: View {
    @ObservedObject var cityProvider: CityProvider

    var body: some View {
        NavigationView {
            List {
                ForEach(cityProvider.addedCities) { city in
                    ...
                }
            }
        }
    }
}
# Add shortcuts for navigation and deletion
Using the same pattern we can add other keyboard shortcuts, for example, for navigation or to delete a city from the list.
override var keyCommands: [UIKeyCommand]? {
    var result: [UIKeyCommand] = []

    if cityProvider.addedCities.count > 1,
        let selectedIndex = cityProvider.selectedIndex {

        if selectedIndex > 0 {
            result.append(
                UIKeyCommand(
                    action: #selector(selectPreviousCity),
                    input: UIKeyCommand.inputUpArrow,
                    modifierFlags: [.shift, .command],
                    discoverabilityTitle: "Select Previous City"
                )
            )
        }

        if selectedIndex < cityProvider.addedCities.count - 1 {
            result.append(
                UIKeyCommand(
                    action: #selector(selectNextCity),
                    input: UIKeyCommand.inputDownArrow,
                    modifierFlags: [.shift, .command],
                    discoverabilityTitle: "Select Next City"
                )
            )
        }
    }

    if cityProvider.selectedCity != nil {
        result.append(
            UIKeyCommand(
                action: #selector(deleteCity),
                input: "d", modifierFlags: [.command],
                discoverabilityTitle: "Delete City"
            )
        )
    }

    return result
}
If you support navigation with keyboard shortcuts in your app, you will need to implement programmatic navigation.
Feel free to get the code for this project from GitHub and play around with it. Try adding and deleting cities and navigating between them. Check what shortcuts are available at what point by pressing and holding the command ⌘ key on the keyboard. For example, you can only see the navigation commands Select Previous City and Select Next City when there is more than one city in the list.
If you try it on the iPad simulator, the keyboard shortcuts might not be very reactive, but they work well when using a physical device with an attached hardware keyboard.
WWDC 2026 offer: 30% off!$45$32
A detailed guide on gradually adopting SwiftUI in UIKit projects
Updated for iOS 26 and Xcode 26!
Integrating SwiftUI into UIKit Apps
- Upgrade your apps with new features like Swift Charts and Widgets
- Support older iOS versions with effective backward-compatible strategies
- Seamlessly bridge state and data between UIKit and SwiftUI using the latest APIs
A detailed guide on gradually adopting SwiftUI in UIKit projects
Integrating SwiftUI
into UIKit Apps
Updated for iOS 26 and Xcode 26!