

Mesh gradients in SwiftUI
A mesh gradient is a technique for rendering smooth, multi-directional color transitions across a surface using a structured network of control points. Unlike linear or radial gradients, which interpolate color along fixed axes, a mesh gradient defines colors at specific positions within a two-dimensional grid. These positions act as anchors, and the rendering engine computes smooth interpolations between them across the surface.
This makes mesh gradients particularly well-suited for complex, organic color transitions that cannot be achieved with simpler gradient types. They have been part of vector illustration tools for years and are now available in SwiftUI starting with iOS 18 and macOS 15, where they can be used for both static designs and animated effects.
# Defining a mesh gradient
To define a mesh gradient in SwiftUI, we can use the MeshGradient struct and choose one of its available initializers. We always have to provide the width and height of the mesh, which define how many points are arranged horizontally and vertically in the grid.
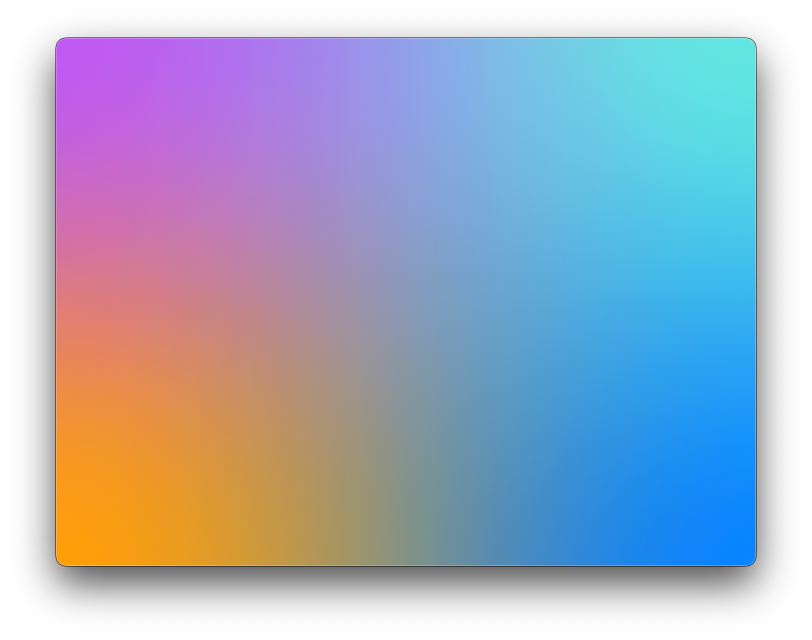
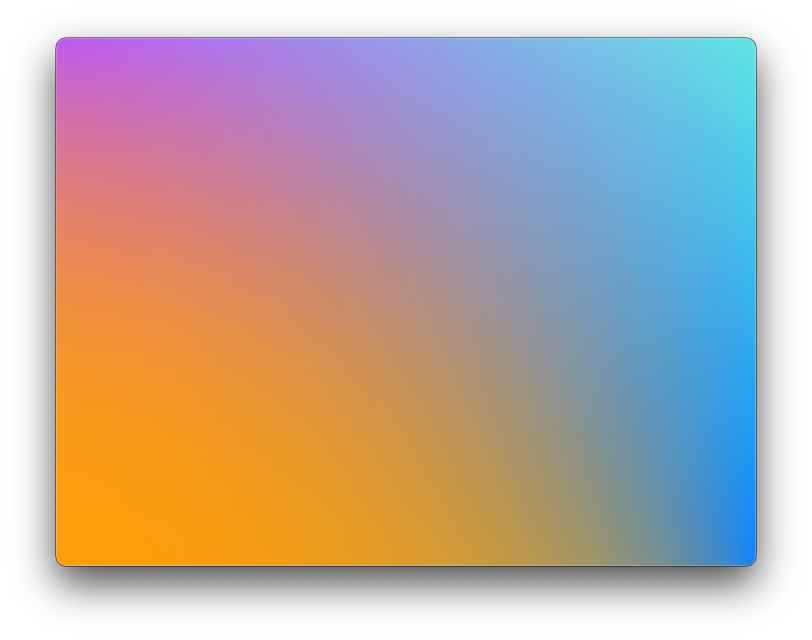
The simplest mesh gradient we can make is a 2×2 grid. This gives us four corner points, each with its own position and color, and defines a single patch, which is a rectangular area where SwiftUI blends the colors between the four corners.
MeshGradient(
    width: 2,
    height: 2,
    points: [
        [0, 0], [1, 0],
        [0, 1], [1, 1]
    ],
    colors: [
        .purple, .mint,
        .orange, .blue
    ]
)
Mesh points are expressed as SIMD2<Float>, but we can also use array literals to create each point, as in our example. The points array defines the position of each vertex in the mesh, laid out row by row. The colors array assigns a color to each point in the same order. SwiftUI takes care of interpolating the color transitions between these points to produce a smooth blend across the surface.
# Gradient geometry
The points we use to define a mesh gradient are in the coordinate space of the gradient view. A point like [0, 0] refers to the top-left corner, while [1, 1] refers to the bottom-right. If we want the gradient to fit exactly within its container, the outermost points in the mesh must span the full range from 0 to 1 along both axes. This means the top row of points should have a y-coordinate of 0, the bottom row a y-coordinate of 1, and the left and right columns x-coordinates of 0 and 1 respectively.
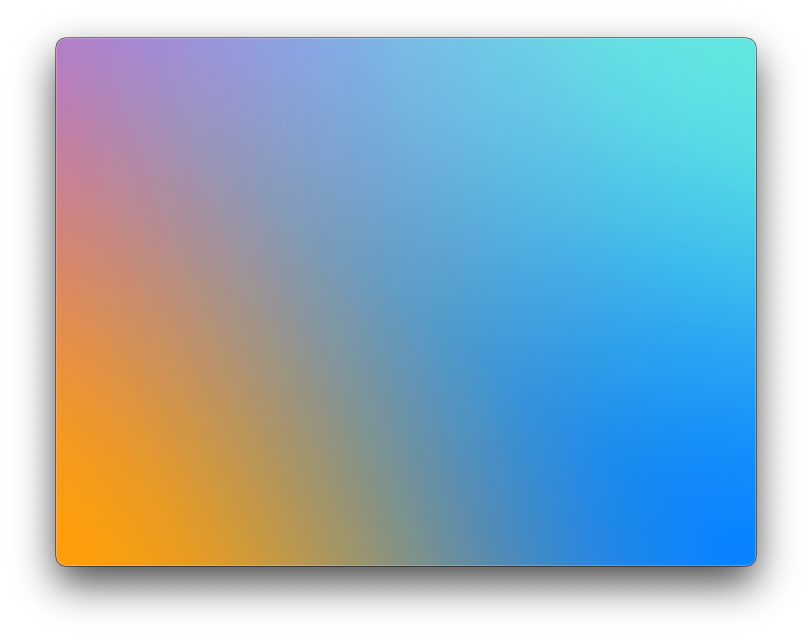
But we can also assign coordinates outside that range. For example, if we move the top-left point to [-0.4, -0.4] instead of [0, 0], the most intense purple color will begin outside the visible area, resulting in a more subtle appearance within the view.
MeshGradient(
    width: 2,
    height: 2,
    points: [
        [-0.4, -0.4], [1, 0],
        [0, 1], [1.0, 1.0]
    ],
    colors: [
        .purple, .mint,
        .orange, .blue
    ],
)
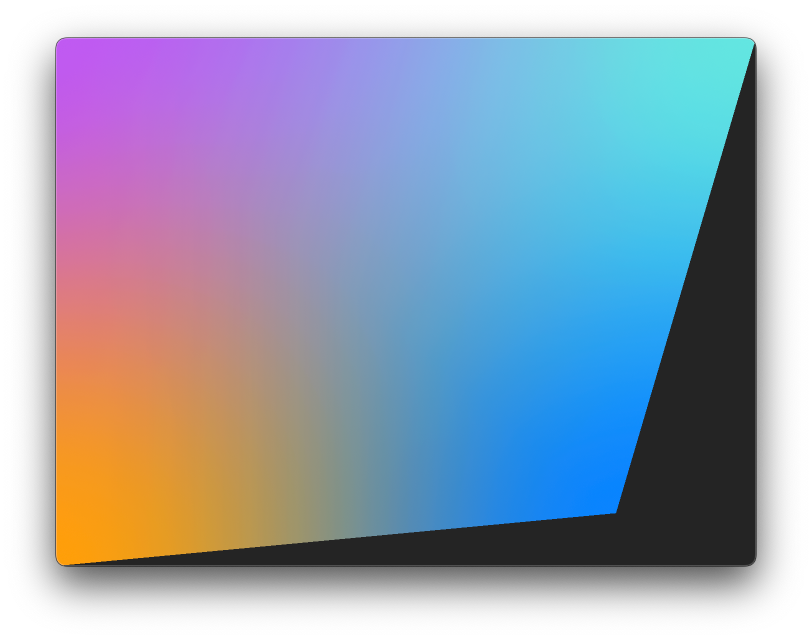
In contrast, if a point that lies along the outer edge of the mesh doesn’t reach the corresponding edge of the view, the gradient will stop short in that area. Setting the bottom-right point to [0.8, 0.9], for instance, leaves part of the view uncovered, since the mesh no longer fully reaches the bottom and trailing edges.
MeshGradient(
    width: 2,
    height: 2,
    points: [
        [0, 0], [1, 0],
        [0, 1], [0.8, 0.9]
    ],
    colors: [
        .purple, .mint,
        .orange, .blue
    ]
)
# Background fill
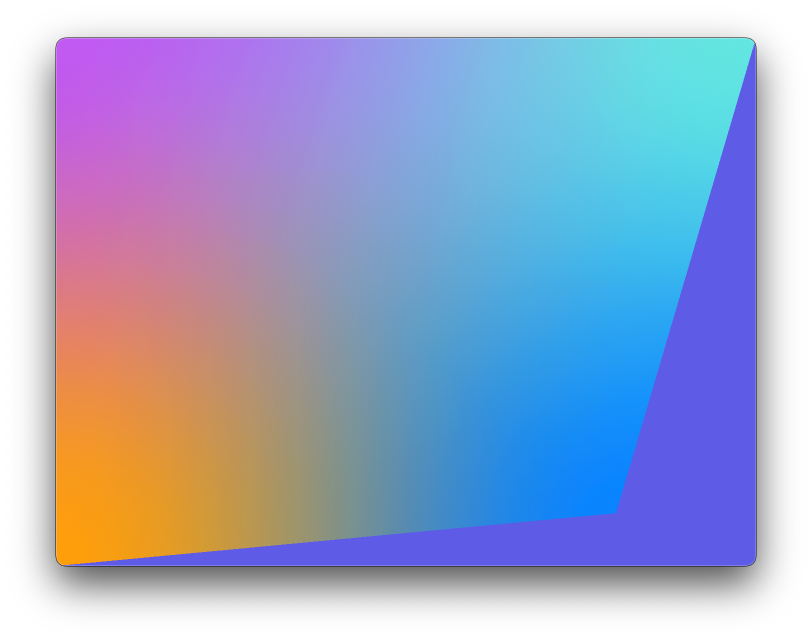
By default, the background of a mesh gradient is set to Color.clear. This means that any part of the view not covered by the mesh, such as areas where the points don’t extend all the way to the edges, will show whatever is behind the gradient. That might be the background of the containing view or the window itself if nothing else is drawn underneath. If we want to fill those uncovered areas with a specific color instead, we can pass a background parameter to the initializer.
MeshGradient(
    width: 2,
    height: 2,
    points: [
        [0, 0], [1, 0],
        [0, 1], [0.8, 0.9]
    ],
    colors: [
        .purple, .mint,
        .orange, .blue
    ],
    background: .indigo
)
# Color adjustments
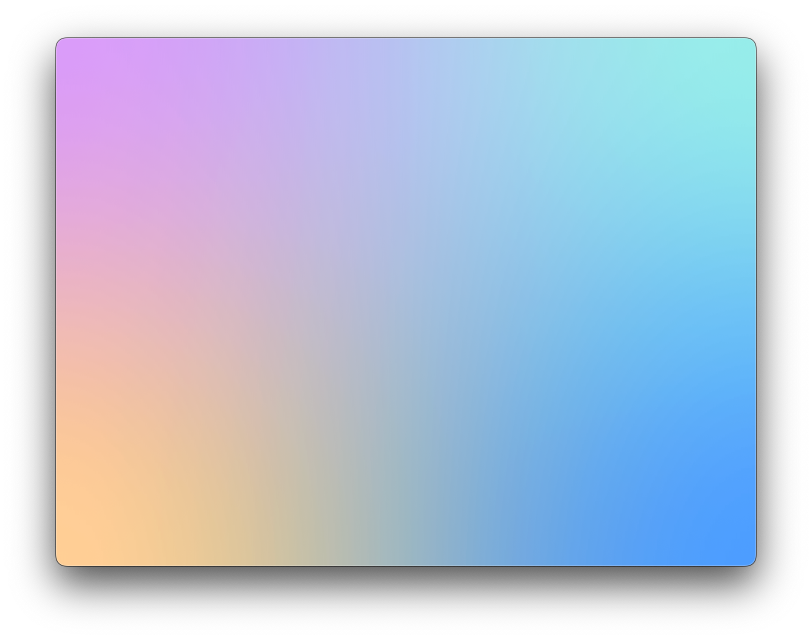
Each color in the colors array we provide to the gradient initializer can be modified using any method on Color that returns a Color. For example, we can adjust the opacity of individual segments to create a more muted appearance.
MeshGradient(
    width: 2,
    height: 2,
    points: [
        [0, 0], [1, 0],
        [0, 1], [1.0, 1.0]
    ],
    colors: [
        .purple.opacity(0.6), .mint.opacity(0.7),
        .orange.opacity(0.5), .blue.opacity(0.8)
    ],
    background: .indigo
)
.background(.white)
In this case, the color passed in the background parameter of the initializer does not show through the semi-transparent colors. It only fills areas outside the bounds of the mesh if the points don’t fully span the view, as we saw earlier. The transparency of the colors themselves allows the view behind the gradient to show through, which in this example is the white background applied to the gradient view.
# Bezier points
While creating a mesh gradient from SIMD2<Float> points is the most straightforward approach, we can also declare it using MeshGradient.BezierPoint instead. This gives us more control over how the colors stretch and blend. Even if we stick to a simple 2×2 grid, we can shape the color transitions by adjusting the control points of each Bezier point. For example, we could make the orange color in the bottom-leading corner take up more space by positioning its top control point above the center of the mesh and its trailing control point farther toward the trailing edge.
MeshGradient(
    width: 2,
    height: 2,
    bezierPoints: [
        // Top-left: [0, 0]
        MeshGradient.BezierPoint(
            position: [0.0, 0.0],
            leadingControlPoint: [0.0, 0.0],
            topControlPoint: [0.0, 0.0],
            trailingControlPoint: [0.0, 0.0],
            bottomControlPoint: [0.0, 0.0]
        ),
        // Top-right: [1, 0]
        MeshGradient.BezierPoint(
            position: [1.0, 0.0],
            leadingControlPoint: [1.0, 0.0],
            topControlPoint: [1.0, 0.0],
            trailingControlPoint: [1.0, 0.0],
            bottomControlPoint: [1.0, 0.0]
        ),
        // Bottom-left: [0, 1]
        MeshGradient.BezierPoint(
            position: [0.0, 1.0],
            leadingControlPoint: [0.0, 1.0],
            topControlPoint: [0.0, 0.4],
            trailingControlPoint: [0.9, 1.0],
            bottomControlPoint: [0.0, 1.0],
        ),
        // Bottom-right: [1, 1]
        MeshGradient.BezierPoint(
            position: [1.0, 1.0],
            leadingControlPoint: [1.0, 1.0],
            topControlPoint: [1.0, 1.0],
            trailingControlPoint: [1.0, 1.0],
            bottomControlPoint: [1.0, 1.0]
        )
    ],
    colors: [
        .purple, .mint,
        .orange, .blue
    ]
)
# Advanced grids
Whether we are using SIMD2<Float> or BezierPoint to construct the grid, we can experiment by adding more points to create unique and expressive gradients. Below is an example of a 4×4 mesh that uses bright colors and an interesting distribution of points across the surface. The slight shifts in interior point positions introduce gentle curves and directionality.
MeshGradient(
    width: 4,
    height: 4,
    points: [
        [0.0, 0.0], [0.3, 0.0], [0.7, 0.0], [1.0, 0.0],
        [0.0, 0.3], [0.2, 0.4], [0.7, 0.2], [1.0, 0.3],
        [0.0, 0.7], [0.3, 0.8], [0.7, 0.6], [1.0, 0.7],
        [0.0, 1.0], [0.3, 1.0], [0.7, 1.0], [1.0, 1.0]
    ],
    colors: [
        .purple, .indigo, .purple, .yellow,
        .pink, .purple, .pink, .yellow,
        .orange, .pink, .yellow, .orange,
        .yellow, .orange, .pink, .purple
    ]
)
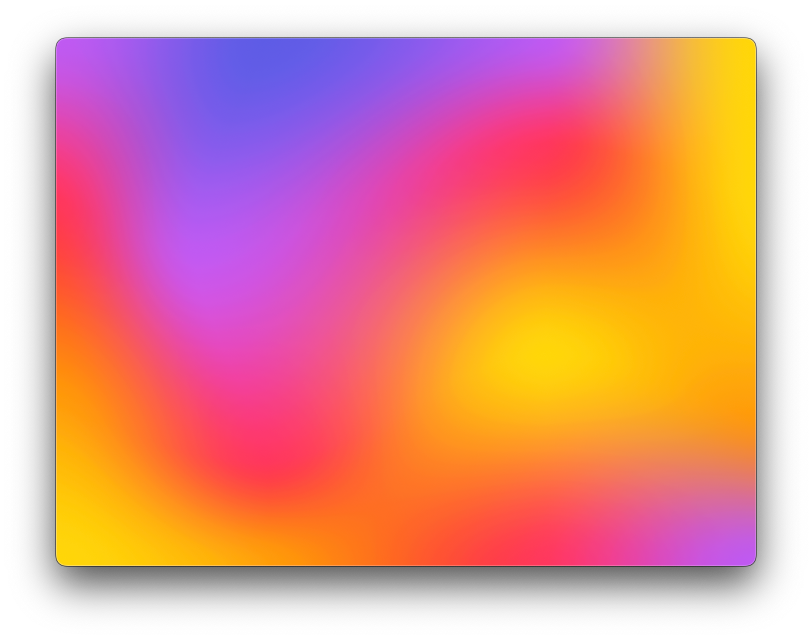
As we add more points, though, it becomes increasingly important to pay attention to how they are arranged. We should place the points in a consistent progression from lower to higher values, both across rows and down columns, for the automatic blending of colors to work correctly. Specifically, the x-values should increase from left to right within each row, and the y-values should increase from top to bottom within each column.
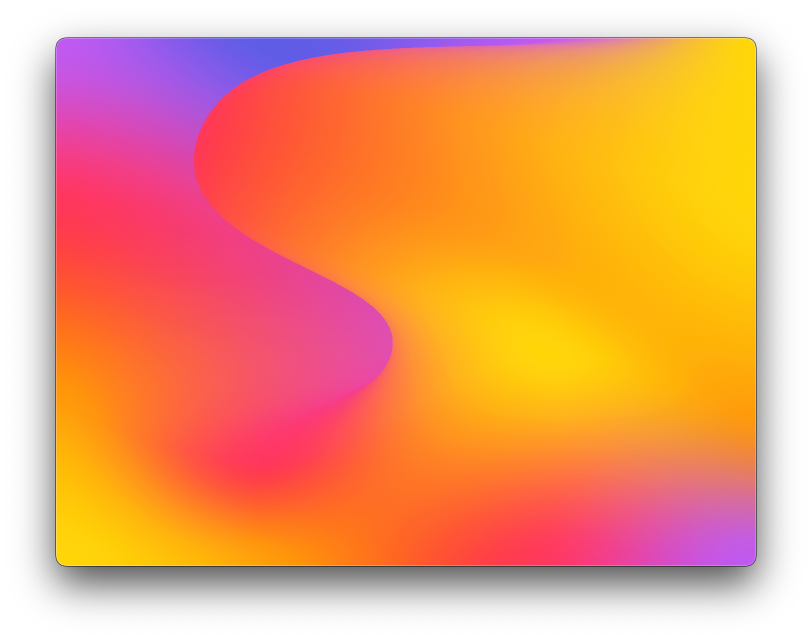
For instance, in the second row of our earlier example, the points were ordered as [0.0, 0.3], [0.3, 0.4], [0.7, 0.2], [1.0, 0.3]. If we swap the x-values of the two middle points so the row becomes [0.0, 0.3], [0.7, 0.4], [0.2, 0.2], [1.0, 0.3], the horizontal progression is no longer valid. As a result, the color blending breaks down. Instead of transitioning gradually, we'll get a clean-edged wave running through the middle. This might be the intended effect in some designs, but it's important to understand that point ordering affects how colors blend across the surface.
MeshGradient(
    width: 4,
    height: 4,
    points: [
        [0.0, 0.0], [0.3, 0.0], [0.7, 0.0], [1.0, 0.0],
        [0.0, 0.3], [0.7, 0.4], [0.2, 0.2], [1.0, 0.3],
        [0.0, 0.7], [0.3, 0.8], [0.7, 0.6], [1.0, 0.7],
        [0.0, 1.0], [0.3, 1.0], [0.7, 1.0], [1.0, 1.0]
    ],
    colors: [
        .purple, .indigo, .purple, .yellow,
        .pink, .purple, .pink, .yellow,
        .orange, .pink, .yellow, .orange,
        .yellow, .orange, .pink, .purple
    ]
)
# Animated gradients
If we want to take mesh gradient design even further, we can animate the positions of individual points. This creates a dynamic, flowing visual effect as the gradient continuously shifts and reshapes itself. Since the mesh is defined by precise point positions, even small changes can produce interesting motion and fluid transitions in how the colors blend.
In the example below, we use a TimelineView with the animation schedule to update the mesh over time. A sine and cosine wave are used to offset a few of the interior points, which results in a smooth oscillating effect across the gradient.
TimelineView(.animation) { context in
    let time = context.date.timeIntervalSince1970
    let offsetX = Float(sin(time)) * 0.1
    let offsetY = Float(cos(time)) * 0.1

    MeshGradient(
        width: 4,
        height: 4,
        points: [
            [0.0, 0.0],
            [0.3, 0.0],
            [0.7, 0.0],
            [1.0, 0.0],
            [0.0, 0.3],
            [0.2 + offsetX, 0.4 + offsetY],
            [0.7 + offsetX, 0.2 + offsetY],
            [1.0, 0.3],
            [0.0, 0.7],
            [0.3 + offsetX, 0.8],
            [0.7 + offsetX, 0.6],
            [1.0, 0.7],
            [0.0, 1.0],
            [0.3, 1.0],
            [0.7, 1.0],
            [1.0, 1.0]
        ],
        colors: [
            .purple, .indigo, .purple, .yellow,
            .pink, .purple, .pink, .yellow,
            .orange, .pink, .yellow, .orange,
            .yellow, .orange, .pink, .purple
        ]
    )
}
By animating only a few internal points and keeping the outer edges fixed, the gradient maintains its overall frame while producing natural movement within. This technique is especially effective for backgrounds, loading states, or interactive visualizations where a subtle sense of motion adds depth and interest.
Mesh gradients are an interesting component to explore. They can be used in a variety of ways, such as dynamic backgrounds, decorative fills for shapes, or to draw attention to specific elements like buttons. When used thoughtfully and in moderation, they can add visual variety without overwhelming the interface.
If you are looking to build a strong foundation in SwiftUI, my book SwiftUI Fundamentals takes a deep dive into the framework's core principles and APIs to help you understand how it works under the hood and how to use it effectively in your projects. And my new book The SwiftUI Way helps you adopt recommended patterns, avoid common pitfalls, and use SwiftUI's native tools appropriately to work with the framework rather than against it.
For more resources on Swift and SwiftUI, check out my other books and book bundles.

Work with SwiftUI. Not against it.$35
A field guide to SwiftUI patterns and anti-patterns
The SwiftUI Way
- Avoid common SwiftUI pitfalls
- Build deeper intuition for the framework
- Gain insights from a former SwiftUI Engineer at Apple
Work with SwiftUI. Not against it.
A field guide to SwiftUI patterns and anti-patterns
The SwiftUI Way